


Yes, you too can make wooden beads from scratch. I've done it, as seen here.
By taking a pruned oak tree branch, leaving it to 'season' (or dry out) for a few weeks in- or outside, then debarking it, you can have wood ready to craft your oak beads. Many tree wood will work, such as maple.
I was fortunate to have an pin oak tree that had required pruning, earlier in the summer. (The tree is in good health, since the day that a squirrel buried a nut one fall, and sprouted over 15 years ago. Now, our yard's squirrels have food for years.)
The steps are simple, and require only natural ingredients. The only items that affected the project's carbon footprint are: an electric saw and a natural gas stove. If you want to go 'more green', you can use a hand saw and a wood fire, made from leftover oak branches.
Greenest yet would be to use a solar reflecting oven. Or, place dying ingredients in a sealed glass jar, and 'brew' outdoors, like sun tea. (The process may be slower, and depth of color may be lighter, without directly boiling your brew.)
The steps in order are: (1.) cut branches into slim blanks, (2.) debark, (3.) sand surfaces, (4.) drill hole near center, and (5.) dye your beads. (Photos shown here.)
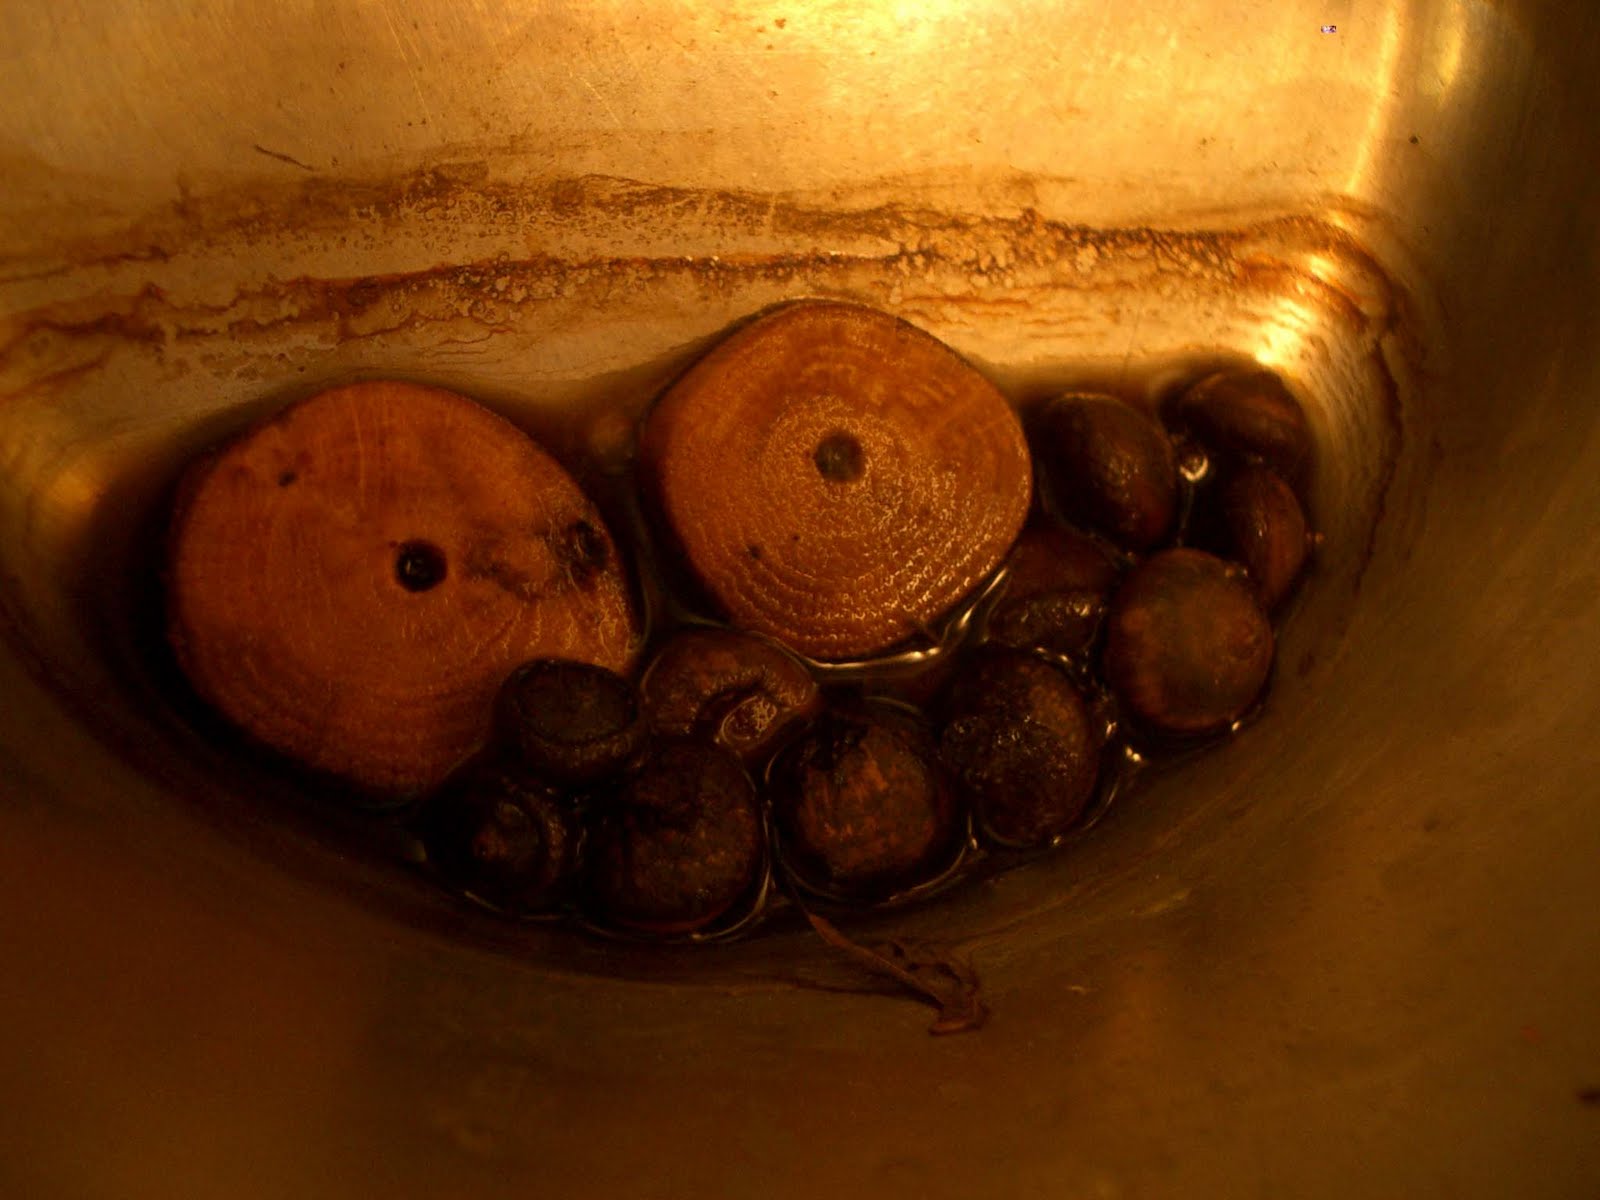
Dye Recipe: Add ripe oak acorns from ground to a small quantity of water. Heat and boil acorns, until water becomes dark brown (up to 1/2 an hour).
I use a dedicated stainless steel cook pot for this, to ensure I will not be cooking food later in a tainted vessel, hence ingesting tannin residue imparted into my meal. The tannin compound found in both the oak wood and acorns is inherent in all the bark, leaves, and roots of the tree, as well. Any part of the plant, other than the acorn may be used for this process. That is why it makes such an intense, natural wood dye.
Add beads. Boil from 5-10 minutes, then turn heat off. I left mine soak for about an hour. The oak will absorb whatever water and dye it can. Remove your beads from the dye solution. Then, set out to dry over a couple of days. Finish with a coat or two of melted or paste wax, such as as beeswax or a carnuba compound. Apply, then rub to a shine, and reapply.
This was my first modern attempt at making natural beads. I am satisfied enough to try shaping my wood into various forms. Of course, you can shape your wood beads into any shape you can design and render--either by hand tools, or by a Dremel or flexshaft tool. Good luck with yours.
No comments:
Post a Comment